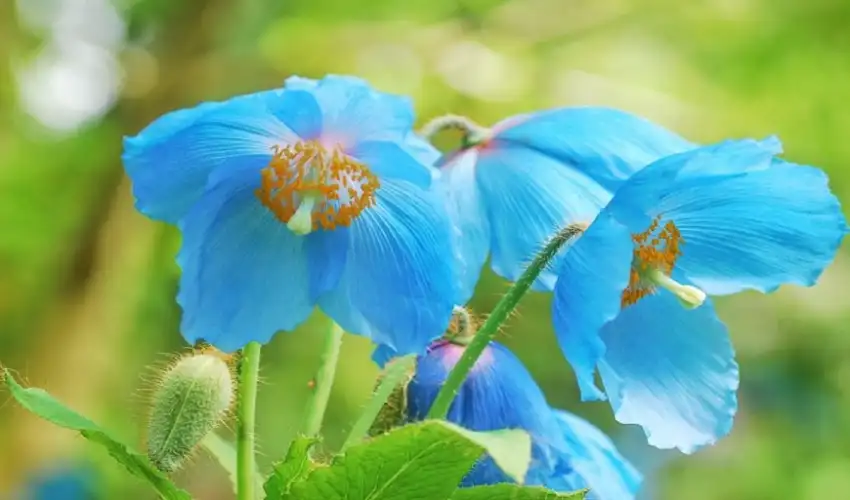
A Step by Step Guide How to Dry Poppy Flowers at Home
Drying poppy flowers can be a fulfilling project for those who want to preserve the delicate beauty of these blooms. Whether you’re a hobbyist, a gardener, or someone looking to use dried poppies for crafts and decorations, this guide will help you achieve perfect results. Let’s go through the process step by step.
Why Dry Poppy Flowers?
Before diving into the process, it’s essential to understand why drying poppies can be valuable:
- Aesthetic Appeal: Dried poppies add a natural, rustic charm to any space.
- Craft Projects: Perfect for making potpourri, wreaths, or dried flower arrangements.
- Preservation: Extends the life of your blooms for months or even years.
Step 1: Harvesting Poppy Flowers
Timing is Crucial: The best time to harvest poppies for drying is when the petals are fully open but before they begin to wilt or fall. Early morning, after the dew has dried but before the afternoon heat sets in, is an ideal time to cut them.
Tools Needed:
- Sharp scissors or garden shears
- A clean container or basket to carry the flowers
Instructions:
- Cut the stems at a slight angle about 6-8 inches from the base of the flower head. This allows for better water intake if you plan to condition the flowers before drying.
- Make sure the stems are long enough for easy handling during the drying process.
Step 2: Preparing the Flowers
Remove Unwanted Leaves: Strip any excess leaves from the stem as they can hold moisture and promote mold growth during the drying process.
Inspect for Damage: Check the petals and stems for any signs of insects or damage. It’s best to remove any parts that are discolored or compromised to ensure that only healthy blooms are dried.
Step 3: Choose a Drying Method
There are several techniques for dried poppy pods. Each has its advantages, depending on your preferences and available resources.
Method 1: Air Drying
Air drying is one of the most popular methods for drying flowers because it requires minimal tools and retains much of the natural appearance of the flowers.
What You Need:
- String or twine
- A dark, dry, and well-ventilated space (e.g., a closet or attic)
Instructions:
- Gather the poppies in small bunches of about 5-7 stems.
- Tie the ends of the stems together with string, leaving a loop for hanging.
- Hang the bunches upside down in your chosen space. The dark environment helps maintain the color of the petals, while good air circulation prevents mold.
- Leave the flowers for 1-2 weeks or until the petals are dry and brittle to the touch.
Tips: Avoid areas with high humidity as this can delay the drying process and lead to mold growth.
Method 2: Silica Gel Drying
For those who prefer a method that preserves the shape and color of the flowers more vividly, silica gel drying is a great option.
What You Need:
- Silica gel (available at craft or floral supply stores)
- An airtight container
Instructions:
- Pour a layer of silica gel into the container, about 1-2 inches deep.
- Place the poppy flowers face-up on the silica gel, ensuring they don’t touch each other.
- Gently pour more silica gel over the petals until the flowers are completely covered.
- Seal the container with its lid and leave it undisturbed for 5-7 days.
- After the drying period, carefully remove the flowers and gently shake off any excess gel.
Tips: Use a soft brush to remove any remaining particles without damaging the delicate petals.
Step 4: Alternative Methods
Microwave Drying
For those short on time, microwave drying can be a rapid alternative. This method is ideal for single blooms or small batches.
What You Need:
- Microwave-safe container
- Silica gel
- Microwave
Instructions:
- Place a layer of silica gel in the microwave-safe container.
- Position the flower on the gel and cover it with more gel.
- Microwave on low or medium power for 1-3 minutes, checking periodically.
- Let the container cool before opening it and removing the flower.
Tips: Be cautious with the timing to prevent overheating, which can cause the flowers to become brittle or discolored.
Step 5: Storing Dried Poppy Flowers
Storage Tips:
- Avoid Direct Sunlight: Store your dried flowers in a cool, dark place to prevent color fading.
- Seal in Containers: Use airtight containers or wrap the flowers in tissue paper to prevent moisture exposure.
- Handle Gently: Dried poppies are delicate, so handle them with care to avoid breaking the petals or stems.
Long-Term Preservation: If you want to ensure your dried flowers remain in top condition for a long time, consider using a spray-on floral sealant or hairspray for extra durability.
Step 6: Creative Uses for Dried Poppy Flowers
Once your poppy flowers are completely dried, there are many creative ways to use them:
- Decorative Bouquets: Add to vases for a timeless home decoration.
- Wreaths and Garlands: Incorporate into seasonal wreaths or garlands for a rustic touch.
- Potpourri: Mix with other dried flowers and essential oils for a fragrant potpourri.
- Crafts and Art: Use for DIY greeting cards, scrapbooks, or wall art.
Final Thoughts
Drying poppy flowers at home is an enjoyable project that lets you preserve the beauty of nature for months or years. With careful attention to harvesting, preparation, and drying techniques, you can achieve stunning results. Whether you choose air drying, silica gel, or the microwave method, following these steps will ensure you capture the vibrant essence of your poppy blooms.
By experimenting with different methods and storage techniques, you’ll find the best way to make your dried poppies last and look their best. So why wait? Start drying your poppy flowers and add a touch of lasting elegance to your home today!
